Disclosure: some of the links below are affiliate links or discount codes, meaning, at no additional cost to you, if you click through an affiliate link and make a purchase, we may make a commission.
Didn’t get to ‘spring cleaning’ this year? Don’t worry – summer cleaning is just as effective! Spurred by the acquisition of a bespoke stand-sit desk, thanks to Mr. Chef, we have started in the office. It’s funny how a new item or plant brought into a space makes you see it with fresh eyes. In this case, it illuminated our need to declutter and detail-clean a bit more than we have.
In the era of remote work, a clean and organized home office is not just a luxury – it’s a necessity. A cluttered workspace can be distracting and frustrating; it can also hinder your productivity. Ask us how we know 🤦. So, we took some notes and created this rather comprehensive guide to help walk you through the process of cleaning your own home office: managing paper, organizing bookshelves, and creating a functional and inspiring workspace.
Step 1: Declutter the Space
The first step in transforming your home office is to *surprise!* declutter. Begin by removing everything from your desk, shelves, and other surfaces. Clear the sticky notes from your walls, the books in a pile on top of your bookshelf, tchotchkes. This can seem overwhelming, but it’s essential for a thorough clean. Then sort everything into three categories: keep, discard, and relocate. Be ruthless in deciding what to keep and ask yourself if the item has been used in the last year, if it’s useful, or if it’s still beautiful (or ‘sparks joy’ in Marie Kondo terminology). Items that receive the answer of ‘no’ should be donated or discarded. For the items that don’t belong in your office, relocate them now to make the next part easier. Pro tip: use the “one-touch” rule – handle each item only once and decide its fate immediately to avoid procrastination. Remember the categories are: keep, discard, and relocate; there is no ‘maybe’ pile.
Step 2: Deep Clean Your Office
Look at you, passing ‘Go’ and saving 200 hours of your life. Ha. Okay, once you’ve decluttered, it’s time to clean. We don’t like it anymore than you do, but the result will be worth it – promise. Play some of your favorite up-beat music or a funny podcast as you dust all surfaces, including books, equipment, and decorative items. Then use a damp cloth to wipe down all surfaces: your desk, bookshelves, and any other furniture. Pay special attention to wiping down and disinfecting those high-touch areas like your keyboard, mouse, and doorknobs. It’s gross, we know. We’re almost done: time now to vacuum! In addition to getting the main areas, pay attention to corners and under furniture.
Step 3: Organize Your Desk
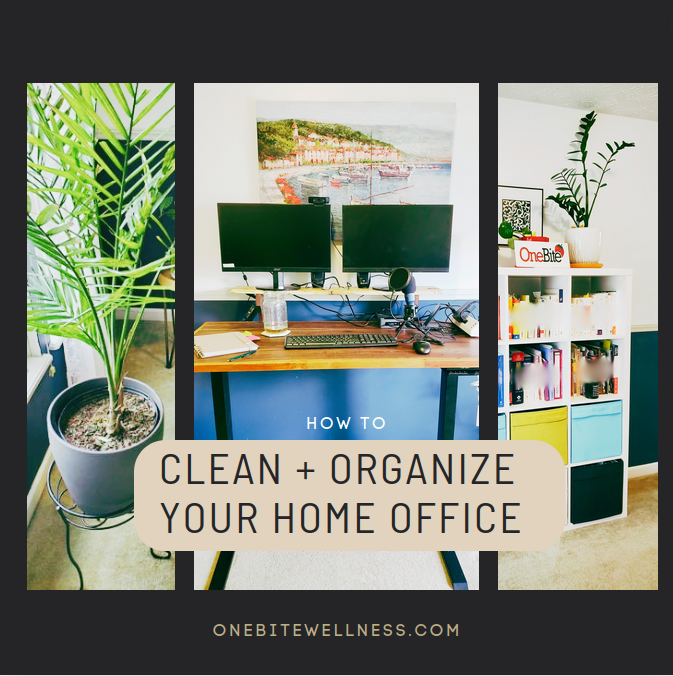
A minimalist, clutter-free desk is crucial for productivity. Keep only essential items on your desk: your computer, your planner or notepad, pens, phone charger, and perhaps a desk lamp. You can add some personal touches like a small plant, fun Lego or origami creation, or photo of loved ones for a bit of charm without cluttering your desktop. Another tip is to have a desk organizer or tray (especially if your desk doesn’t have drawers, like ours). This can help keep small items such as pens and pencils, paper clips, and sticky notes in order. Keep in mind that cable organizers can keep your cords untangled and out of sight, creating a cleaner workspace (and, in our case, safe from bunnies!).
Step 4: Paper Management
Gah. Blech. This is our office-archnemesis. The battle has gone on for years and this summer, we aim to prevail. Paper clutter can overwhelm an office, especially one at home where paperwork for both career and for home intermingle and, seemingly overnight, breed more gremlins. Some crucial steps to take: 1. sort your papers into categories such as: “to do”, “to file”, and “to shred”. For the to-do papers, we recommend taking care of them immediately – signing the permission slip or calling the bank – if they won’t take more than a few minutes each. Alternatively, you can plan for a block of time in your week to address them. When it comes to the “to file” pile, this is where it’s worth investing in a filing cabinet or box. Label each folder clearly and file documents as they come in or at the end of the day. Common categories may include “bills”, “receipts”, “client files” and “reference materials”. This is also a chance for you to jump from analog to digital: try to download (versus printing) or scan in documents and store them in ‘the cloud’ or on an external hard drive. The beauty of digital is that it reduces material clutter in your office while ensuring your documents are backed up and accessible. Now the fun part: destruction (evil laugh optional)! Shred or safely burn those old documents in a fire pit; maybe toast vegan marshmallows over it.
You probably know better than to pour water on a gremlin. Similarly, to prevent the multiplication of papers in your life, set up a regular schedule, perhaps once per week, to sort through your papers and file or discard as necessary to prevent clutter from building up.
Step 5: Create Functional Zones
Let the activities of your work dictate specific zones to keep your space organized and ensure everything has a designated place. Common zones: work zone (this is your desk and computer area where you get the majority of your tasks done), reference zone (shelves or cabinets where you keep books or reference materials), and a supply zone (a space for office supplies). Storage solutions like baskets, bins, and trays can keep each zone tidy and organized. You never know when you’re going to need to quickly grab packing tape or a highlighter.Step 6: Organize Your Bookshelves
If you’re done Step 1 and 2, you’ve already removed all items from your bookshelves and cleaned them. Now it’s time to sort your books into categories that make sense to you. Here are some popular methods for arranging books (you can see which one we’ve chosen in the photo above):
Alphabetical: By author or title.
Genre/Topic: Group by subject matter.
Size: Organize by height for a clean and uniform look.
Color: Arrange by the color of their spines for a visually appealing display.
Remember that during this process you’re also to decide which books to keep, donate, or discard.
Step 7: Personalize Your Space + Maintain it
A personalized office space can be enjoyable and inspiring. Incorporate items that reflect your personality and motivate you such as: photos or artwork, action figures, an aromatherapy diffuser with your favorite essential oils, or even a colorful rug. Plants can help bring nature inside, calm us, and improve air quality. Choose a color scheme that boosts your mood and productivity. Consider, as we did, adding a vision board with your goals and inspirations to keep you motivated and focused.
Remember that regular maintenance can help your office continue to be a place where you feel energized, organized, and calm. To prevent clutter from building back up, spend a few minutes at the end of each day tidying up your space by putting items away and filing papers. About once a month, do a more thorough cleaning: dusting shelves, vacuuming, and removing outdated documents. Each season provides a chance to do a ‘refresh’ where you can swap out decorative items, rotate in different plants or books. This keeps your workspace dynamic and interesting.
Following these detailed steps can help you transform your home office into a clean, organized, and productive space. You’ll boost your efficiency and your enjoyment in the new environment too!
